Meniscus Transplantation for Arthritis
Meniscus Transplantation for Arthritis
Meniscus transplantation for arthritis; what you should know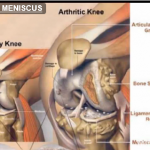
Summary: Meniscal replacement by allograft is increasingly common in our practice. In order to succeed, a replacement must duplicate the mechanical function of the original meniscal cartilage. The technique of replacement described in this article permits minimal disruption of the joint tissues, accurate placement of the meniscal horns, and secure fixation of the meniscal synovial junction…
* * * * *
 “Meniscus Transplantation for Arthritis” – Meniscal cartilage replacement by allograft, prosthesis, and regeneration scaffolds has advanced from the laboratory to clinical practice (1-5). To facilitate meniscal cartilage replacement, specific instruments and techniques have been developed to ensure accurate and reproducible placement of the meniscal implants. For meniscal cartilage replacement to succeed, the following goals must be accomplished:
- The torn fragmented pieces of native meniscal cartilage must be removed.
- The attachment sites for the meniscal horns must be anatomically placed.
- The periphery of the meniscal implant must be attached securely enough to permit axial and rotational loads.
- The surrounding capsule and ligaments of the knee joint must be neither excessively violated nor constrained by the fixation technique.
To achieve these goals, the following steps are recommended. Initially, complete diagnostic arthroscopy of the knee joint is accomplished in the routine fashion. If anterior cruciate ligament surgery is to be performed simultaneously, the femoral and tibial tunnels for the cruciate reconstruction should be drilled first.

The torn portion of the meniscal cartilage is evaluated. If meniscal repair cannot be accomplished due to severity of the tear or poor quality of the tissue, then preparation of the meniscal rim is undertaken by removing the torn portions of the cartilaginous tissue (Fig. 1). In the setting of allograft replacement, nearly all of the remaining meniscus is removed. Additionally, for allograft replacement, resection of the meniscal horns and preparation of bony tunnels to accept bone plugs may be required. In the setting of scaffold replacement, only the damaged portions are removed, preserving the peripheral rim and horns for attachment of the scaffold. If absolutely no meniscal rim is present, then meniscal scaffolding should not be performed. If the joint is excessively tight, a joint distractor may be applied or the medial collateral ligament may be partially released.
For medial or lateral meniscal replacement, place the arthroscope in the mid-lateral or anterior lateral portal and the tibial guide through the anterior medial portal. The tip of guide is brought first to the posterior horn of the meniscus. It should be noted that the posteromedial horn inserts on the posterior slope of the tibial eminence. A drill pin is then brought from the anterior medial side of the tibial tuberosity to the posterior horn insertion (Fig. 2).
The pin placement can be confirmed by passing the arthroscope through the intercondylar notch and viewing the exit site of the pin. Extreme care must be undertaken to avoid penetration through the posterior capsule of the knee, endangering the neurovascular bundle. When the pin position is confirmed, the pin is then over-drilled with a 4.5-mm cannulated drill bit with the option of a drill stop to prevent posterior capsular penetration (Fig. 3). The bit is left in place and used as a tunnel to pass a suture passer with a #2 Ethibond (Johnson & Johnson) suture. The suture is passed up the bore of the drill bit, the drill bit removed, and the suture left in place.
Attention is now turned to the anterior drill hole. For the medial meniscus, it must be noted that the anterior medial meniscus insertion varies considerably. Most often it can be found anterior to the medial tibial eminence. The anterior horn of the lateral meniscus inserts just posterior to the ACL. Identify this insertion and place the tip of the drill guide so that a relatively vertical hole will be made (Fig. 4). Place the drill pin, then overdrill with the cannulated drill bit, and place the suture passer. Alternatively, the anterior horn of the medial meniscus may be affixed with a suture anchor directly to bone.
Before grasping the suture from the anterior and posterior drill holes, widen the anterior portal to approximately 2 cm. The suture grasper should then be passed through the widened portal, and both the anterior and the posterior sutures brought out simultaneously. This technique prevents the sutures becoming entangled in two different planes of the fat pad and capsular tissue. The importance of this step cannot be overstated; occasionally the posterior suture will pass through one tissue plane, and the anterior through another plane, causing the implant to become stuck in the soft tissues.
The implant is now brought onto the field. Two horizontal mattress sutures of #2-0 ethibond are placed through each horn of the implant with the free ends exiting the inferior surface (Fig. 5).
The two posterior sutures are then drawn through the knee and out the posterior tibial tunnel (Fig. 6). If viewing from a mid-lateral portal, the anterolateral portal can be used for probe insertion to push the implant medially into place through a 1-inch incision. No insertion cannula is required. The anterior sutures are then similarly passed. The horn sutures are then tied over the anterior tibial bony bridge.
Next, zone specific meniscal repair cannulae are brought into place. For medial insertions, a series of small puncture incisions are used to retrieve the sutures Through these multiple small incisions, the suture needles can be captured and the knots placed directly over the capsule (Fig. 7). Although nonabsorbable suture is used for the meniscal horns for added strength, absorbable suture [2-0 polydioxone (PDS)] is recommended for the body of the scaffold. The smooth monofilament is less abrasive and resorbs as the scaffold is metabolized.
When using the meniscal repair needles, the posterior cannulae should be used first, with the sutures placed vertically and evenly spaced. Progress from posterior to anterior so that a buckle is not produced within the implant. Tie each knot as it is placed to avoid the chance of suture tangling. Space the knots approximately 4 mm apart. Cycle the knee through several complete ranges of motion to ensure that the implant moves smoothly without impingement.
When performing a lateral meniscal replacement (Meniscus Transplantation for Arthritis) , we now preserve a bone bridge between the horns of the meniscus and create a trough to secure it on the tibial plateau. The remainder of the insertion technique remains the same, except that great care should be taken to protect the neurovascular bundle when suturing the posterior horn. We prefer suture knot tying through small puncture holes rather than open posterior lateral or medial incisions.
Routine skin closure and dressings are applied. Thirty milliliters of 0.5% Marcaine (Astra) with epinephrine mixed with 30 cc of lidocaine are always instilled for immediate post operative pain relief in regards to meniscus transplantation for arthritis.





You must be logged in to post a comment.